
How to Store Royal Icing Transfers
Royal icing transfers are edible sugar decorations prepared from royal icing, used to adorn cookies and even cakes!
Royal icing transfers make cookie decorating easier, faster, and more precise by allowing you to create detailed designs. They help achieve consistent, professional-looking cookies, reduce mistakes, prevent color bleeding, and save time.
They make it easy to trace a specific design, add dimension to the royal icing cookie surface, and allow you to prep decorative elements for months ahead of time.
This makes them a convenient option for decorators of all levels.
Preparing Royal Icing Transfers
Getting your royal icing transfers right from the start is key to making sure they store well later on.
To ensure that your new icing transfers turn out well, it’s essential to use the right consistency of royal icing. The ideal consistency for royal icing transfers is thick, with a 20-second count. This means that when you lift the piping bag, the icing should hold its shape and not flood off of the area.
To achieve the right icing consistency, you can adjust the amount of powdered sugar and water in your royal icing recipe.
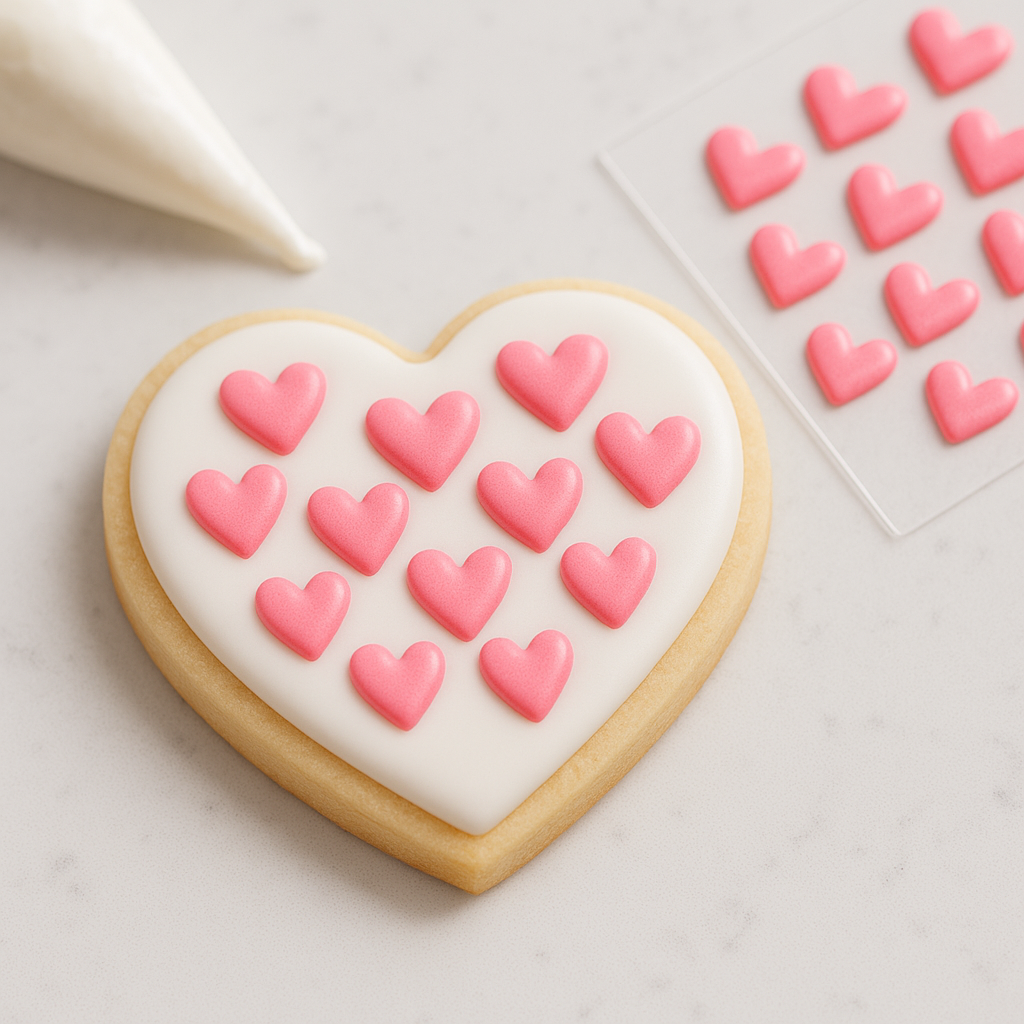
Once you have the right consistency, you can start piping your royal icing transfers onto wax paper, parchment paper, or acetate. Make sure to pipe in a steady, smooth motion, and use a consistent amount of pressure to avoid creating air pockets.

Start Here:
Why Acetate Is Better Than Parchment Paper for Royal Icing Transfers
When making royal icing transfers, the surface you pipe onto makes a big difference in how easily they release and how smooth they turn out.
While parchment paper is a common choice, acetate sheets (or transparency sheets) offer several advantages over wax paper that make them the better option.
The surface of a royal icing transfer should be flat
easycookiedecorating.com
and even for the best results when applied to cookies. That’s what acetate will do!
Smoother Surface = Shinier Transfers
Acetate has a completely smooth, non-porous surface, which helps make royal icing transfers dry with a shinier, more polished finish. In contrast, parchment paper has a slightly textured surface that can leave transfers looking more matte or slightly rough.

Easier Release Without Curling
Royal icing tends to stick slightly to parchment paper during the drying process which can cause delicate transfers to break or curl when peeling them off. Acetate allows transfers to release easily and stay flat, preventing warping.
More Stability While Piping
Acetate sheets lay completely flat on a work surface, while parchment paper can wrinkle or shift as you pipe. This added stability makes it easier to create detailed designs without distortion.
Better for Layered Designs
If you’re making dimensional or layered royal icing transfers, acetate holds up better when stacking multiple layers of royal icing decorations together. It won’t absorb moisture like parchment paper can, which helps prevent color bleeding or softening between layers.
Reusable and Durable
Unlike parchment paper, which is disposable and can wrinkle or tear, acetate sheets are washable and reusable—making them a great long-term investment for cookie decorators.
When to Use Parchment Paper Instead
While acetate is generally the better choice, parchment paper can still work well for smaller, simpler transfers or when you need a quick, disposable option. However, if you want crisp, smooth, and easy-to-remove transfers, acetate is the way to go!
This will get you off to a great start before you move to the next step of storing them.
Remember! Royal icing transfers are fragile, so it is recommended to make extras in case of breakage.
How Do You Store Royal Icing Transfers?
Royal icing transfers are a great way to get ahead on decorating, but proper storage is key to keeping them in perfect shape until you’re ready to use them. With the right storage methods, your own royal icing transfers, will stay crisp, vibrant, and easy to work with for months!
Let Transfers Dry Completely
Before storing, make sure your royal icing transfers are fully and completely dry first. This usually takes at least 24 hours, depending on humidity. Any leftover moisture can cause them to stick together, break, or go bad.
The most important thing here is to make sure they are completely, 100%, no-doubt-about-it, fully dry.
Use Parchment or Wax Paper for Cushion
To prevent sticking, layer transfers between sheets of parchment or wax paper. This keeps them separate and makes it easy to grab just what you need without damaging delicate designs.
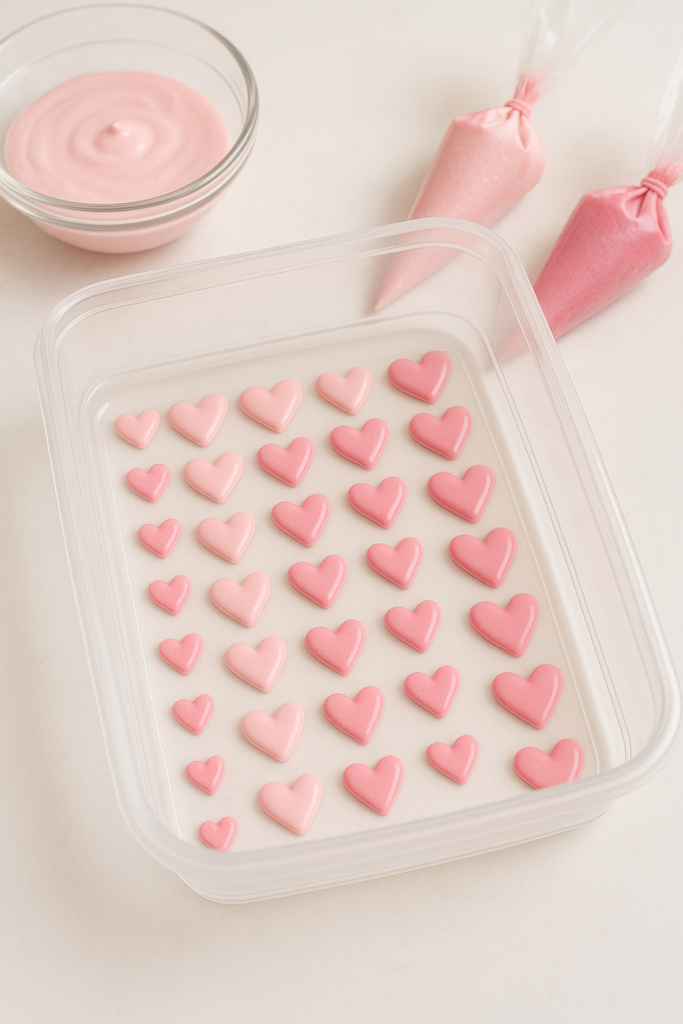
Store in an Airtight Container
Gently place your layered transfers in an airtight container to protect them from dust, humidity, and accidental breakage. A shallow container works best to prevent stacking too many layers on the container on top of each other.
Keep in a Cool, Dry Place
Humidity is the biggest threat to royal icing transfers. Store them in a cool, dry place, such as a pantry or cupboard, away from heat sources like ovens or direct sunlight.

Avoid the Fridge or Freezer
Unlike storing fresh royal icing, refrigerating or freezing royal icing transfers is not recommended. Royal icing absorbs moisture, and cold storage can cause them to soften, become sticky, or lose their shape when brought back to room temperature.
How Long Do Royal Icing Transfers Last?
When stored properly, royal icing transfers can last for several months—even up to a year!
Since they are made of dried sugar and meringue powder, they have a long shelf life as long as they are kept in the right conditions.
Over time, they may become more fragile, so handle them gently when using them after long storage periods.
Storage Tips for Royal Icing Transfers
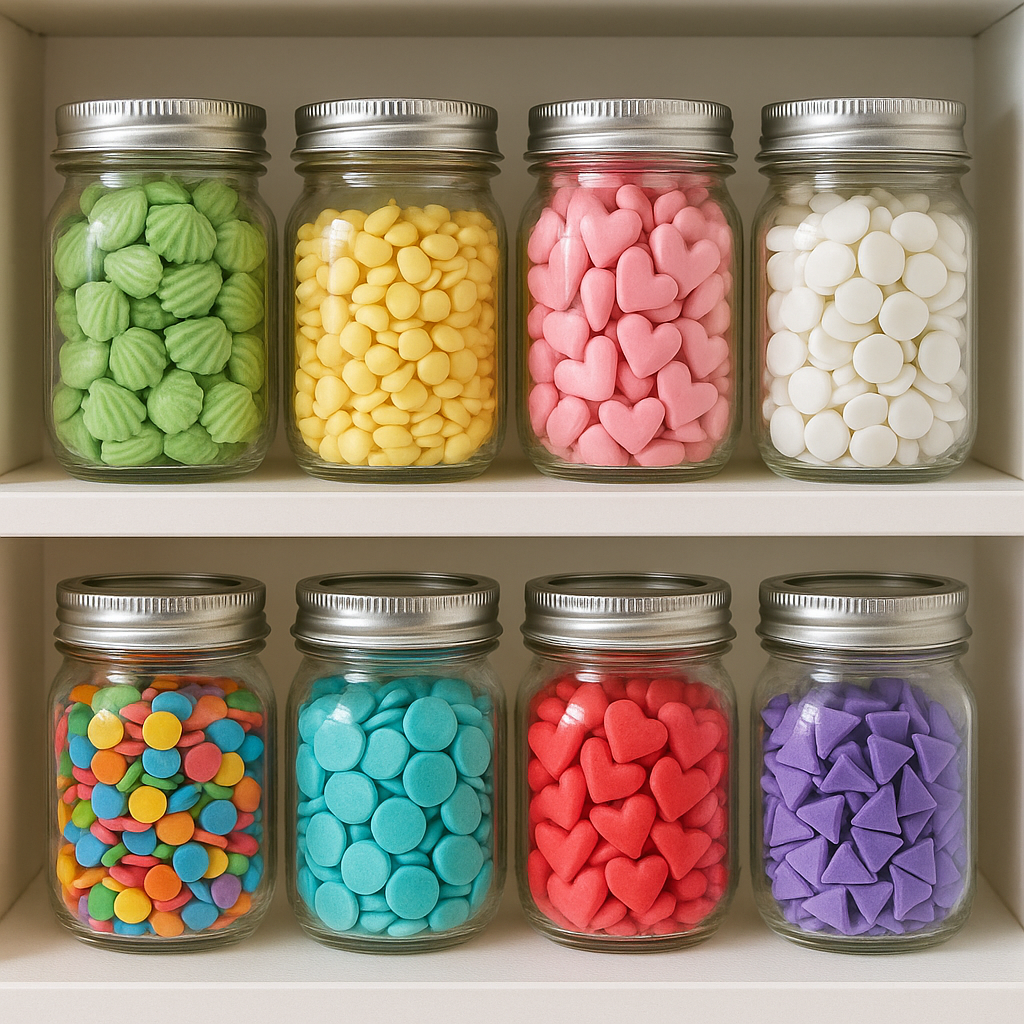
- Use a small Ball jar or a similar container to store the transfers, separated by shape and size.
- Store jars in a cabinet for easy access and to keep them away from moisture.
- Use labels on the lids for easy identification and to keep track of the contents.
- Store royal icing transfers in a dry place, away from moisture and direct sunlight.
- Use an airtight container and layer transfers between paper towel sheets to prevent moisture from accumulating.
- Consider using food-grade silica gel packets will absorb moisture and keep the transfers fresh.
Common Storage Mistakes to Avoid
- Avoid storing royal icing transfers in a humid environment, as this can cause them to become sticky or develop an unpleasant texture.
- Don’t store royal icing transfers in direct sunlight, as this can cause them to fade or become discolored.
- Avoid storing royal icing transfers in a container that is not airtight, as this can cause them to become stale, develop an unpleasant texture, or go bad.
- Avoid storing royal icing transfers in a container that is not clean and dry, as this can cause them to become contaminated.
Take Your Cookie Decorating to the Next Level with Cookie Transfermation!
If you love the idea of making royal icing cookies with transfers but struggle with making them look polished or don’t know how to use them effectively, Cookie Transfermation is the perfect solution!

This step-by-step course teaches you how to create beautiful, professional-looking cookies with royal icing transfers, making decorating easier, faster, and more stress-free.
Ready to decorate with confidence? Join Cookie Transfermation today and start making effortless cookies you can FINALLY be PROUD OF! ✨
Inside Cookie Transfermation, you’ll learn how to:
- ✔️ Make perfect royal icing transfers that hold their shape and dry smoothly
- ✔️ Use transfers to decorate cookies with flawless precision—even if you don’t have a steady hand!
- ✔️ How to apply transfers like a pro to save time and create consistent, bakery-quality designs
Using Stored Royal Icing Transfers in Cake Decorating
Royal icing transfers aren’t just for cookies—they can be a fun and easy way to decorate cakes, cupcakes, and other desserts! Think of them like custom-made sprinkles or edible decorations that you can apply whenever you need a quick, professional-looking touch.
Since transfers are lightweight and sturdy, they can be arranged on buttercream or fondant without losing their shape. Simply place them on a freshly frosted cake, or attach them with a small dab of icing or frosting for a secure hold.
You can also use them to create monograms, floral accents, or themed designs that elevate your baked goods with minimal effort. They work great for making character designs too!
Experiment with different shapes, sizes, and colors to design completely customized cakes and cupcakes for birthdays, weddings, or special events.
Whether you’re looking to add a delicate lace pattern, playful characters, or elegant lettering, royal icing transfers provide a precise and mess-free way to decorate, giving your cakes that polished, bakery-quality finish!
Frequently Asked Questions
How to store royal icing transfers long term?
When storing royal icing transfers for the long term, it’s essential to ensure they remain in pristine condition. First, make sure the transfers are completely dry before storage. Place them between layers of parchment or wax paper to prevent sticking and store them in an airtight container. Keep the container in a cool, dry place, away from direct sunlight and humidity. Avoid refrigeration or freezing, as moisture can damage the transfers. With these steps
How far in advance can I make royal icing transfers?
You can make royal icing transfers well in advance of your decorating needs, up to a year!
Just ensure they are completely dry before storing them in an airtight container, layered with parchment or wax paper, and kept in a cool, dry place. By planning ahead, you’ll have beautifully crafted royal icing transfers ready whenever inspiration strikes!
Can you put royal icing transfers in the fridge?
It is not recommended to put royal icing transfers in the fridge. The moisture in the refrigerator can cause the transfers to soften, become sticky, or lose their shape.
Instead, store them in a cool, dry place in an airtight container to maintain their crispness and vibrant colors. This will ensure that your royal icing transfers stay in perfect condition until you’re ready to use them.
Does royal icing need to be refrigerated?
No, royal icing does not need to be refrigerated. In fact, it’s best to store royal icing at room temperature in an airtight container.
Refrigeration can introduce moisture, causing the icing to become sticky or lose its consistency.
If you have leftover icing, keep it in a cool, dry place, ensuring that it remains at room temp and away from direct sunlight to maintain its texture and usability for your cake decorating projects. You can read up my tips for storing royal icing here.
Conclusion
- Royal icing transfers can last for up to a year! They’re super shelf stable and food safe to use to decorate cookies or even cakes.
- Storing royal icing transfers requires careful attention to detail and a few simple tips and tricks, but are super easy to store. It all starts with creating the perfect icing transfer using acetate!
- Remember to store royal icing transfers in an airtight container, away from moisture and direct sunlight, and to use a food-grade silica gel packet or rice to absorb moisture.
- With proper storage and care, royal icing transfers can be a convenient and versatile tool for decorators of all levels.
- Want to learn the best ways to store royal icing for your next cookie project? Check out my full guide on storing royal icing here! ✨