How to Decorate Cookies with Royal Icing: A Complete Guide for Beginners
This complete guide will show you how to turn your plain cookies into stunning treats! You’ll also find loads of helpful tips along the way.
From making delicious royal icing, to mastering various decorating techniques, this guide has you covered to help you create beautiful, professional-looking cookies!
Key Takeaways
Royal icing is essential for cookie decorating, offering a hard-drying finish that allows for precise designs and is made from meringue powder or egg whites, powdered sugar, and water.
Understanding and mastering the three royal icing consistencies—flood, medium, and stiff—is key to successful cookie decoration, each serving specific purposes from covering larger areas to detailed designs.
Proper preparation and storage of royal icing cookies, including drying time and packaging methods, are crucial for maintaining their quality and presentation.
Royal icing can be more difficult to work with than traditional buttercream frosting, but once you learn the basics, you’ll be ready to master the art!
Essential tools for working with royal icing include piping bags (both tipless and those with tips), edible food pens, and a scribe.
Techniques to master include controlling icing consistency for outlining and flooding and mastering the delicacy of pressure piping. It’s important to remember to always practice before decorating actual cookies to test consistencies and techniques!

Understanding Royal Icing
Royal icing is a staple in the world of cookie decorating, and for most bakers it’s probably the most daunting!
This versatile icing, made from just a few simple ingredients, is renowned for its ability to dry hard, making it perfect for intricate designs and layering.
Unlike other types of frosting like buttercream, royal icing allows decorators to achieve a level of detail and precision that is essential for professional-looking cookies.
Primarily used for decorating sugar cookies, royal icing is also essential for gingerbread houses and making royal icing transfers.
Mastering the different consistencies of royal icing—flood, medium, and stiff—is key for achieving various decorating effects. Whether you’re a beginner or a seasoned pro, mastering royal icing is the first step to creating cookies that are not only delicious but also beautiful.
Primarily used for decorating sugar cookies, royal icing is also essential for gingerbread houses and royal icing transfers.
Essential Ingredients for Royal Icing
Gathering the right ingredients is the first step in creating perfect royal icing. The essential components are meringue powder, powdered sugar, and water.
Meringue powder is technically a substitute for raw egg whites, and it provides the necessary stability for royal icing. It is an ingredient that CANNOT be substituted. Luckily meringue powder can be easily found in the baking aisles of craft stores, or online (even on Amazon!)

The other basic ingredients for royal icing include powdered sugar (or confectioners sugar), and water. Some recipes also call for corn syrup to add a bit of shine and ensure the icing isn’t too hard when you bite into it.
There’s nothing worse than rock-hard cookies that break your teeth! Soft royal icing will still dry completely firm but is much more enjoyable to eat!
A good royal icing recipe not only ensures a smooth finish but it also tastes delightful. The sweetness of the powdered sugar balances well with the slight tang of the meringue powder, creating a delicious royal icing that enhances the flavor of your sugar cookies. You can always add flavoring such as clear vanilla extract or lemon extract for a pop of flavor.
Remember, the quality of your ingredients will directly impact the quality of your royal icing recipe, so choose wisely!
🌟 Grab my Favorite Recipes Here 🌟
Making Royal Icing from Scratch
Making royal icing from scratch is a straightforward process, but it requires some attention to detail. It will work better to make the icing from scratch vs. using a premade royal icing mix so you have total control over your recipe.
You’ll need either a stand mixer or an electric mixer to achieve the necessary texture. While a hand mixer can work for small batches, a stand mixer is more efficient for larger quantities.
1. Start the recipe by combining your meringue powder and water in the mixer bowl, and mix on high until frothy. Then gradually add the powdered sugar, corn syrup (if using) and flavoring. Mix on high until a a thick and voluminous texture forms.
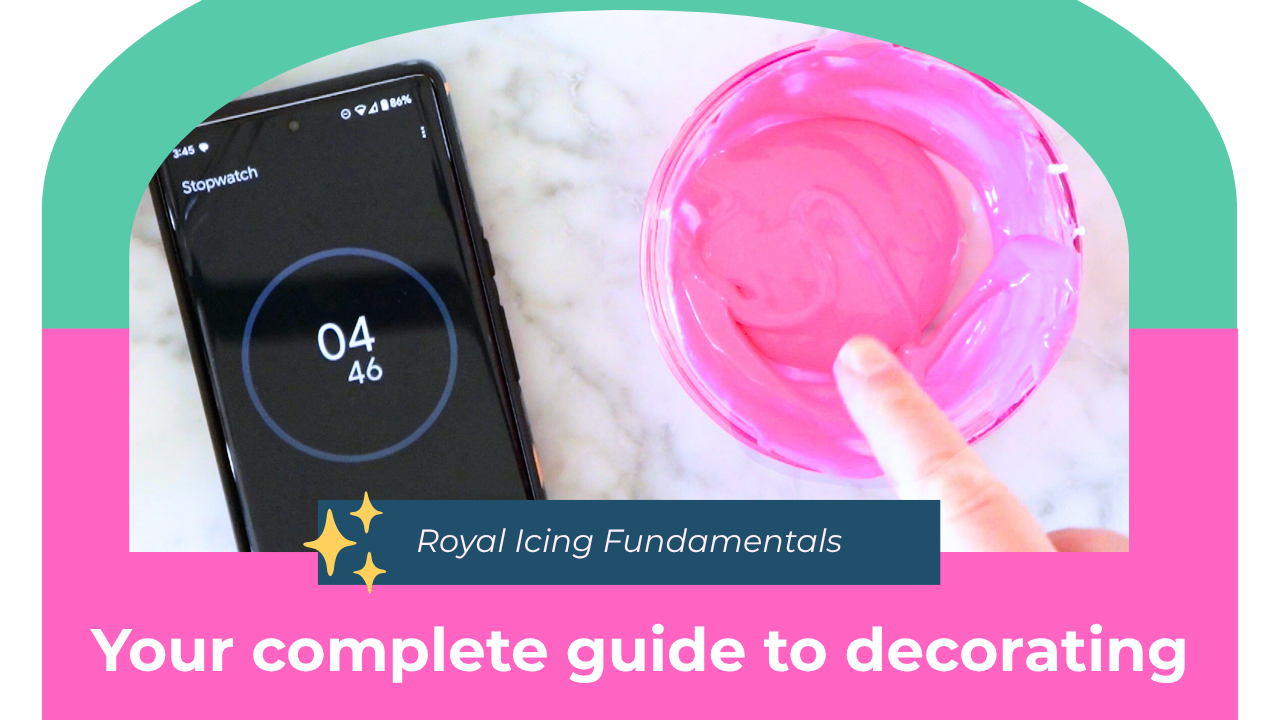
2. Aim for a thick consistency initially, and adjust by adding water in small increments until you reach the desired texture. Mix at a low speed to avoid introducing air bubbles. For flooding royal icing, a good rule of thumb is to drop a bit of icing into the bowl and time how long it takes to smooth over—this should be about 8-10 seconds.
3. Royal icing should only be flavored with clear extracts for a professional cookie decorator look! Clear vanilla extract, lemon or almond extract are all great choices. At this time, you can colorize your royal icing with gel food coloring (more on that below).
4. With your royal icing ready, you’re now prepared to begin the exciting process of decorating! If you are not using your royal icing right away, cover it with plastic wrap so it doesn’t dry out.
The consistency of your royal icing is crucial. Over mixing can lead to a mixture that dries poorly, while under mixing can result in a lumpy texture.
Adjusted water amounts should be mixed in at low speed to avoid large pockets of air forming.
Adding corn syrup can enhance the shine of your royal icing, giving it a glossy finish. However, many prefer a matte look, so this step is optional.
Coloring Your Royal Icing
Coloring your royal icing is where the fun truly begins.
Gel colors or paste food coloring is the preferred choice, as it provides vibrant hues without thinning the icing. Use a toothpick to add color gradually, mixing thoroughly to achieve an even shade. Color your icing before adjusting its consistency to prevent thinning.
For deep colors like red or black, start with a base color such as pink or brown to achieve the desired shade more quickly. Too much saturation can cause colors to bleed together in your design. Adding white food coloring before your main color can also help reduce color bleeding.
Once you’ve achieved the perfect color, you may need to adjust the consistency again by adding more water or powdered sugar. Remember, it’s better to prepare your icing a few hours or even a day in advance to allow the colors to develop fully.
Just Try It!
If it makes you feel more comfortable, find a friend to try it with you – and remember that your first time is truly a trial and error learning experience. You’ll be amazed that even if you make a mistake the cookies will still look amazing!

Preparing Your Piping Bags
Properly preparing your piping bags ensures a smooth decorating process. Thicker disposable pastry bags are preferred as they offer better control and are less likely to burst.
Avoid using ziptop bags, as they lack precision and can easily break and create a mess.
If you plan to use multiple piping tips, consider using a coupler, which allows you to swap tips without changing the entire bag.
Fill your piping bag no more than two-thirds full to ensure easy handling. If you’re NOT using piping tips, you can go tipless by inflating the tip area of pastry bag with air and snipping off a small part of the tip. It’s also a good idea to use ties to prevent the royal icing from drying out in the bag.
Properly prepared piping bags can be filled ahead of time, but be aware that the icing may start to separate if left for more than six hours. If this happens, you can remix the icing by gently massaging the bag with your fingers.
If you plan on using an outlining consistency icing and a separate flood consistency, you’ll need to prepare 2 piping bags for each color your using for your base flood.

Mastering Royal Icing Consistencies
Understanding the various royal icing consistency types is fundamental in cookie decorating. This is the area that arguably takes the most amount of practice for cookie decorators. Understanding how to achieve and use these consistencies will greatly enhance your decorating capabilities.
The four main consistencies are flood, medium, piping, and stiff, each serving a unique purpose.
Flood Icing Consistency
Flood icing is the thinnest consistency, used primarily for filling larger areas of the cookie. It should settle flat within about 10 seconds when tested. To achieve this, add enough water gradually until the icing flows smoothly.
If the icing becomes too thin, you can thicken it by sifting in a little powdered sugar. Using a toothpick or scribe can help spread the flood icing evenly on the cookie surface, ensuring a smooth finish.
• Second Count: 8-10 seconds.
• Similar to: Honey or shampoo.
• Uses: Creating a base layer, filling large areas, executing wet-on-wet techniques, and marbling effects.
• Characteristics: The thinnest consistency, it spreads easily to create a smooth, flat surface but requires the longest drying time.

Medium Consistency Icing
Medium consistency icing is ideal for outlining cookies and adding text. It should form a super soft peak when lifted from the bowl, and will still settle into itself.
This consistency provides a good balance, making it versatile for creating both outlines and some detailed decorations.
• Second Count: Can range from 10-20
• Similar to: Bottled sauces, like Ketchup.
• Uses: Combining outlining and flooding in one step, and creating areas with a puffy appearance.
• Characteristics: Falls between piping and flood consistencies, allowing for efficient decorating without needing to switch consistencies (making it the best to start out with as a beginner!)
Royal icing consistencies are not always an exact science! It takes a great deal of practice to get a feel for the different consistencies you need for your designs.
Using the wrong consistency for the job is the biggest reason cookies can look messy and unprofessional; take as much time as you need to get it right.
easycookiedecorating.com
Stiff Consistency Icing
Stiff consistency icing is essential for intricate designs that require stability, such as florals and ruffles. To check if your icing is stiff enough, scoop some with a spoon and see if it holds its shape.
Stiff icing can dry out quickly, so be sure to cover it when not in use to maintain its texture.
This consistency is perfect for detailed work that needs to hold its form without collapsing.
• Second Count: None – the icing does not settle back into itself.
• Similar to: Cake frosting or buttercream.
• Uses: Creating detailed elements like leaves, flowers, ruffles, and for stenciling.
• Characteristics: This icing holds its shape firmly and doesn’t spread. When a line is drawn through it, the line remains visible indefinitely.
Piping Consistency
Piping consistency is a slightly thinned version of stiff icing, achieved by adding small amounts of water. It is smooth and flows easily from the piping tip while still holding its shape.
This consistency is ideal for creating clean outlines, intricate and puffy lettering, and detailed decorations. If the piped line frequently breaks, the icing is too thick and may need a bit more water. Conversely, if it spreads out too much, it may need a little powdered sugar to thicken it.
• Second Count: About 25 seconds
• Similar to: Toothpaste
• Uses: Outlining cookies, lettering, detail work
• Characteristics: The icing should not form peaks that remain too stiff (that’s an indicator that it’s too thick) or spread out and completely lose definition (too thin).

Basic & Beginner Decorating Techniques
These techniques are at the heart of cookie decorating. Beginners should practice with different consistencies of royal icing to understand how they work together. Begin with basic techniques like outlining and flooding to build a solid foundation.
Remember, there’s no single correct approach—experimenting and finding what works best for you is part of the fun!
Outlining Cookies
Outlining creates a barrier for flooding and adds definition to your designs. In other words, you can create a dam with the outlining icing to prevent flooding icing from spilling over.
Use a thicker icing for outlining, such as medium consistency or piping consistency. Pipe the icing in one unbroken line close to the edge of the cookie, creating a clean, precise border.
Test the consistency by practicing on waxed paper before decorating your cookies.
When it doubt, test it out!
easycookiedecorating.com
Flooding Cookies
Flooding cookies is a fundamental technique in cookie decorating.
You should only begin flooding royal icing once the cookies cool completely.
Start by piping a border of thicker icing around the edge of the cookie to create a dam. Once the outline is set, fill the inside with flood icing, squeezing it into the middle of the shape using the icing in the piping bag and using a spatula or toothpick to spread it to the edges. Ensure the icing flows smoothly and fills the entire cookie without spilling over the sides.
There should be a nice, even layer of flood icing on the cookie.
If you are just starting out, you can use a restaurant squeeze bottle for this step instead of a piping bag as well.
Adding sprinkles, sanding sugar, or nonpareils directly onto the wet icing can enhance the look of your cookies without the need to pipe on any other details.
Use a scribe tool or toothpick to fill in any gaps and achieve a smooth finish. Allow the icing to dry for about 15-30 minutes to start crusting over before adding any additional royal icing details.
Piping Designs
Piping intricate designs requires practice and patience. Ensure each layer of icing is dry before adding more details to maintain clarity. For beginners, limiting your color choices to two or three can make the process more manageable.
The flooded cookie base provides the perfect canvas for letting your imagination and inspiration run wild. Remember: the ideal thickness for piping icing is one that holds its shape well, although mastering the perfect piping consistency will take some practice.

Royal Icing Transfers
Royal icing transfers are pre-made royal icing decorations that are piped onto a separate surface, dried, and then transferred onto cookies, cakes, or other desserts. They allow for more control over intricate designs and can be made in advance, reducing the stress of decorating directly on cookies.
Royal icing transfers offer several advantages for cookie and cake decorating.
All of the cookies below are made with royal icing transfers!

They allow for intricate and delicate designs to be created separately, reducing the risk of mistakes on the final product. Since they can be made in advance, they help save time and streamline the decorating process.
Transfers also provide consistency, ensuring uniform shapes and details across multiple cookies. If a transfer breaks or doesn’t turn out as expected, it can simply be replaced without having to redo an entire cookie.
Additionally, drying them separately helps achieve a smooth, professional finish. By making extras and storing them properly, decorators can have ready-to-use embellishments on hand for future projects.
Learn how to store royal icing transfers here.
learn my secret to perfect cookies using
royal icing transfersI’ve hacked the cookie decorating process into an easy to use, no-fail system to help people achieve cookie perfection on their first try! Click here to learn more.

The Wet on Wet Technique
The wet-on-wet technique involves applying one color of icing directly onto another while the base layer is still wet. This method allows you to create beautiful designs like swirls and marbled effects without the colors drying separately.
Work quickly and strategically to ensure seamless color blending.

Airbrushing Cookies
Airbrushing is a fantastic way to enhance cookie designs by adding depth, shading, gradients, and intricate patterns. It’s a popular technique among cookie decorators to achieve professional-looking results with minimal effort.
It’s also an easy way to achieve pretty designs for beginners, and a great way to skip lettering with royal icing if you use a template with words.

How to Paint on Royal Icing Cookie
Painting on royal icing cookies adds a level of artistry to your designs. Use only food-safe materials when it comes to paint brushes, and ensure the base layer of icing is completely dry before painting to avoid smearing.
Thin your food coloring or luster dust with a bit of vodka or other clear, grain alcohol for easier application and to prevent the icing from breaking down.
Apply light, even strokes to avoid streaking, and consider using edible markers for adding small details. Regular paintbrushes can be used if they are new and free from contaminants.
Remember, NEVER USE WATER to paint on cookies with royal icing, as it can cause the icing to break down.

Drying and Storing Royal Icing Cookies
Properly drying and storing royal icing cookies a super important step. Cookies should dry overnight to ensure details are set.
Allow the cookies to dry completely, which typically takes a minimum of 6-8 hours at room temperature. The thickness of the icing affects the drying time; thicker icing dries faster, while thinner flood icing needs more time to set.
In high humidity environments, using a fan or food dehydrator can speed up the drying process.
Once dried, store the cookies in an air tight container to keep them fresh. Decorated cookies can stay fresh for about five days, and freezing them can extend their shelf life for several months. Before packaging, allow the cookies to dry for a full 24 hours to ensure they are completely set.
Learn how to store royal icing here.
Freezing Decorated Cookies
Freezing decorated cookies can help manage time, especially when preparing for events.
Start by lining a cookie sheet with parchment paper or paper towels. Place the entire tray in the freezer uncovered for 2-3 hours. Once frozen, remove the cookies quickly and place them in a single layer in gallon zip lock bags, sealing and returning them to the freezer immediately.
When ready to use, prepare a cookie sheet lined with paper towels. Remove a bag from the freezer, open it, and gently place the cookies on the tray, icing side up. Move quickly to avoid condensation smudging the icing. Allow the cookies to dry uncovered for 1-2 hours. They will be ready to package or enjoy when no condensation remains on top of the icing.
Packaging the Cookies
Packaging your decorated sugar cookies together properly is essential to maintain their quality and presentation. Allow the cookies to dry for a full 24 hours before packaging to ensure the icing is completely set.
For party favors or events, package cookies individually in clear poly bags to prolong shelf life and protect the icing. This also makes it easy for guests to grab a cookie!
To present the cookies nicely, use kraft boxes lined with waxed paper or parchment paper. Fill any empty spaces in the box with tissue paper or shredded gift paper to prevent the cookies from moving and getting damaged. Never stack cookies directly on top of each other unless they are individually packaged and layered with bubble wrap in between.

Shipping or Mailing Decorated Cookies
Shipping decorated cookies requires careful packing to ensure they arrive intact. Choose durable cookie shapes like round, heart, or square, which are less likely to break during transit. Use two boxes for maximum protection: one to pack the cookies in and another to place the cookie box inside, with protective packaging in both.
Pack the cookies vertically in the box, layering them between sheets of bubble wrap. Fill any empty spaces with tissue paper, bubble wrap, or styrofoam peanuts to prevent movement. Individually wrapping the cookies in clear poly bags can protect the icing and help maintain freshness.
Troubleshooting Common Issues
Even with the best preparations, issues can arise when decorating cookies with royal icing!
Icing Consistency and Mixing Problems:
Achieving the right consistency for royal icing is crucial. Over mixing can incorporate too much air, leading to air bubbles and craters, while under mixing can result in a lumpy texture. A structurally sound base icing is essential to avoid many issues, so ensure the correct ratio of ingredients and mixing technique.
If icing sits too long, it can separate and give a streaky appearance, so remix it before use.
Bubbles can be reduced by using a folding motion and a paddle attachment instead of a whisk.
Humidity can alter the icing’s consistency, requiring recipe adjustments. Practicing with royal icing helps improve consistency and control over designs.

Issues While Piping
When piping, uneven and bumpy lines can occur if the icing tip is pushed along the cookie instead of being pulled. Not using enough flood icing can lead to a lumpy surface, so ensure you use enough icing in your flood layer to create a smooth finish.
When bubbles show up on the surface of the cookie, take a toothpick or scribe to pop them! This ensures your flooding consistency layer dries smooth. You don’t want these bubbles to dry because they will lead to popped craters in your finish.
Drying Problems
Drying problems can cause various issues in royal icing. Craters, caused by air bubbles or slow drying, can be prevented by using stiffer icing and promoting airflow with a fan or dehydrator.
Color bleeding, especially with red, navy, and black, can be minimized by adding titanium dioxide to the base icing.
Butter bleed, where fat from the cookie seeps into the icing, can be avoided by using meringue powder instead of egg whites and drying the cookies on paper towels to draw the fat down to the bottom of the cookie, instead of rising to the top.
Helpful Tools and Supplies
Having the right tools can make cookie decorating much easier and more enjoyable.
Piping bags are essential, with both reusable and disposable options available.
An offset spatula is useful for transferring cookies and smoothing icing for large areas. A cookie swivel or turntable can enhance precision in decorating by allowing smooth rotation for detailed work.
Multiple baking sheets are also recommended to start with as you’ll need the cookies to dry out in single layers on the tray. Parchment paper is great for simplifying cleanup during decorating.
As you become more advanced, consider investing in tools like a projector for consistent patterns, and other tools to create details.

Glossary of Key Terms
Familiarity with cookie decorating terminology helps you navigate recipes and techniques effectively. Here are some key terms:
- Base Icing: A batch of royal icing that is typically thicker and used as a starting point for creating different colors and consistencies. It is the foundation from which you will take icing to create different colors and consistencies.
- Butter Bleed/Blotching: The phenomenon where butter (fat) from the cookie seeps into the royal icing, causing dark spots or discoloration on the surface. This often happens if the cookies are not completely cool, or if they are exposed to heat while drying.
- Color Bleeding: The undesirable effect of royal icing colors running into each other, resulting in blurred lines and a less defined design. This can be caused by over-saturation of gel food coloring (aka using too much), too much water in the icing, or a lack of meringue powder.
- Consistency: Refers to the thickness or thinness of royal icing, which is crucial for achieving different decorating effects. There are three main consistencies: flood, medium, and stiff. Piping is the consistency between medium and stiff.
- Corn Syrup: An ingredient sometimes added to royal icing to help give it a softer bite and a bit of shine.
- Cratering: A common defect in royal icing where small pits, depressions, or even holes form on the surface as it dries. This is often caused by air bubbles, icing that is too thin, or over mixing.
- Crusting: The process where the surface of royal icing forms a thin, dry shell while the icing underneath is still wet. This step is crucial for layering and adding details without the layers sinking into each other.
- Edible Pens/Markers: Pens with edible ink used to draw details or write on the surface of dried royal icing. These pens are also a good option to add lettering to cookies instead of piping, and for kids to help with decorating.
- Flood Icing: A thinner consistency of royal icing that is used to create a smooth base layer on a cookie. It should flow and fill the entire cookie up to the piped borders. This icing should be on the thinner side.
- Food Dehydrator: A tool that can be used to help dry royal icing faster and achieve a better shine by circulating warm air.
- Gel/Paste Food Coloring: A type of food coloring that is preferred over liquid coloring for royal icing because it is more concentrated, less likely to thin the icing, and produces more vibrant colors.
- Glaze: An icing that is similar to royal icing but is made without meringue powder. It behaves differently than royal icing, does not dry as hard, and is egg-free.
- Heat Sealer: A device used to seal bags, often used in the context of packaging decorated cookies to maintain freshness.
- Medium Consistency Icing: Royal icing that is thicker than flood icing but thinner than stiff icing. This consistency is ideal for outlining cookies and filling small areas.
- Meringue Powder: A powdered product containing dried egg whites and other ingredients that is used as a substitute for raw egg whites in royal icing recipes. It also provides stability and helps the icing to dry hard.
- Outlining: A technique used to create a border or dam around the edge of a cookie with thicker consistency icing to contain the flood icing. Outlining can also be used for adding detail and definition to a cookie.
- Over mixing: Beating royal icing for too long, which can cause the incorporation of too many air pockets and bubbles.
- Piping Bag: A cone-shaped bag, usually made of plastic, parchment, or fabric, that is filled with icing and used to apply decorative elements to cookies.
- Piping Tip: A small nozzle that attaches to the end of a piping bag, which shapes the icing as it is squeezed out.
- Projector: A tool used to project an image onto a cookie from your phone or computer so that it can be traced with icing.
- Royal Icing: A hard-drying icing made from powdered sugar, egg whites (or meringue powder), and water, used for decorating cookies, cakes, and other baked goods. It dries hard and opaque.
- RIT (Royal Icing Transfer): A pre-made decoration made from royal icing, piped separately onto parchment or acetate and allowed to dry, then transferred and applied with royal icing ‘glue’ to the cookie.
- Scribe Tool: A pointed tool used to help spread out flood icing or touch up detail work. It is similar to a toothpick but is longer and easier to hold.
- Stiff Consistency Icing: A very thick consistency of royal icing that is used for creating intricate designs like florals, ruffles, or anything that needs to hold its shape.
- Tipless Piping Bag: A piping bag that is designed without the need for a metal piping tip, allowing for greater control over the amount of icing being dispensed and the size of the opening.
- Turntable/Cookie Swivel: A rotating platform that allows for easy rotation of a cookie while decorating. It is especially helpful for detailed designs that require turning the cookie.
- Wet-on-Wet Technique: A decorating technique where one color of royal icing is applied onto another, still wet, color of icing, to create designs like dots or swirls.
Time to Get Started!
Now that you have all the tools and knowledge you need, it’s time to start your cookie decorating journey. Don’t wait—begin decorating beautiful cookies today and share your creations with family and friends! You got this!
easycookiedecorating.com
Frequently Asked Questions
Click the drop downs below to get answers to the most common questions!